Facebook Ads Manager Guide – How to Create Facebook ads
More than 1.4 billion people use Facebook every day, and on average, each person spends more than 50 minutes a day across Facebook, Messenger, and Instagram.
Sign up to get FREE CRM Trial
That’s a lot of attention! And no matter who your audience is — age, gender, occupation, (almost) anything — you’ll be sure to reach them through Facebook Ads. So, the question becomes …
How do marketers create Facebook ads?
The answer is Facebook Ads Manager.
However, Facebook Ads Manager can look intimidating at the first glance. But don’t worry, once you get below the surface Ads Manager is an amazing tool, offering everything you need to optimize your ads and deliver successful campaigns.
In this post, we’ll share everything you need to know to get familiar with Facebook Ads Manager so Let’s jump in. All you need is:
1: Getting started: All you need to get up and running with the Facebook Ads Manager dashboard.
2: Creating and editing Facebook ads: How to create and edit Facebook ads using Facebook Ads Manager.
Getting started
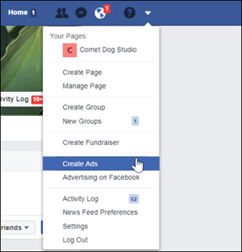
To get started on Facebook Ads Manager, you’ll need a Facebook Business Page to promote your products and services. To begin, log into Facebook and select Create Ads from the drop-down menu in the upper right.
You will be brought to your Facebook Ad Accounts page where Ads Manager generates an account for you and wants to guide you through setting up your first ad campaign.
Alternatively, you can close out of that screen by clicking the Close button in the lower left. Now, you can click the main menu in the upper left to reveal and navigate to the various tools and options in Ads Manager.
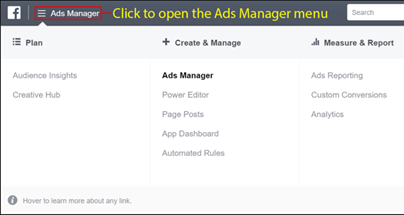
When you arrive to the dashboard, you should see something like this:
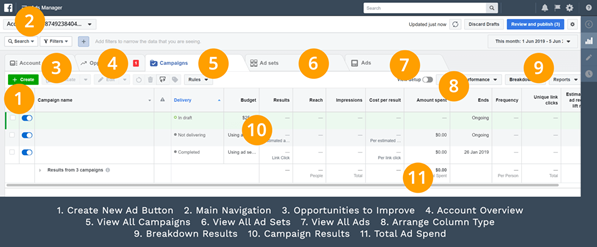
Spend some time clicking around and familiarize yourself with the 5 main tabs in the dashboard: Account, Opportunities, Campaigns, Ad Sets, and Ads.
Creating your first ad campaign
To create your first ad campaign, click on the “Campaigns” tab in your Facebook Ad Manager. Then, click the green “+ Create” button. Then, a screen you may see:
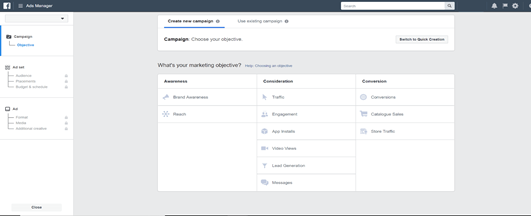
1. Choose Objective
To start your Facebook ad campaign, choose your main objective. There are 3 categories to choose from: Awareness, Consideration, and Conversions. Each has their own specific goals for your ads.
Awareness:
- Brand Awareness
- Reach
Consideration:
- Traffic
- Engagement
- App Installs
- Video Views
- Lead Generation
- Messages
Conversions:
- Conversions
- Catalog Sales
- Store Traffic
Deciding on the right campaign objective is important for how Facebook will allocate your budget, deliver ad formats, as well as optimizing your ads. Try to choose an objective that best suits your business goals. If you are promoting a product or service, you’ll want to choose “Conversions” to get maximum ROI. If you just want to collect leads to use for email marketing, choose “Lead Generation”.
2. Name your campaign
Once you have decided your ad campaign objective, give it a name. After you have given your campaign a name, there are a few additional options on this page.
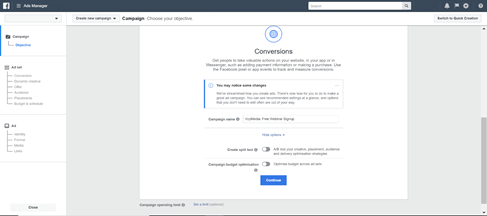
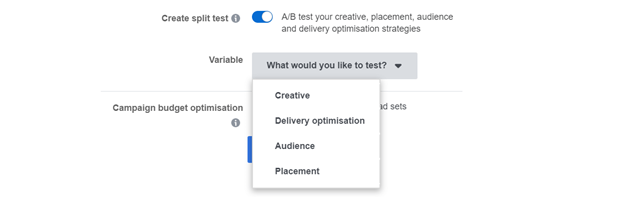
Click on “Show more options” to activate Split testing. Split testing allows you to create A/B variations of your creative, ad placement, audience, and delivery optimization strategies. You can modify 1 element which can be selected in the drop-down menu below.
Below the option to split test is the option to add “Campaign Budget Optimization”. Keep in mind you cannot activate both “Split Test” and “Budget Optimization”. You must choose one or the other.
When you turn on “Budget Optimization” you can choose the amount you want to spend as a “Daily Budget” or “Lifetime Budget”.
You can click on “Show more options” to make changes to: Campaign bid strategy, Ad scheduling, Delivery type.
For now, let’s continue creating an ad campaign with both “Split Test” and “Budget Optimization” turned off. Click “Continue” to proceed to the next step.
Creating ad sets
An ad set defines a group of different ads with specific audiences, placements, budgets, and delivery.
1. Create Your Ad Set Name
Similar to naming your campaign, if you intend to create multiple ad sets, you’ll want to create a naming system to keep your sets organized and easy to understand.
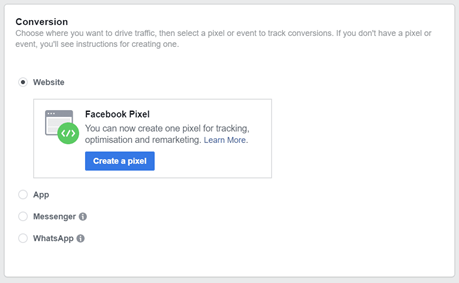
2. Choose Your Conversion Settings
With the “Conversion” objective, you can choose from the following four options:
Website – This will send traffic to your website or landing pages.
App – This allows you to advertise your app along with a specific event to track (i.e. Download).
Messenger – This allows you to use ads that send people into a conversation in your Facebook messenger.
WhatsApp – This allows you to create ads that send people to your WhatsApp messenger and engage a conversation.
3. Defining Your Audience
If you have already tested/created audiences in the past, you can quickly load up those audience settings in the “Custom Audiences” section. Alternatively, if you want to use Lookalike Audiences, you can choose to do that, too.
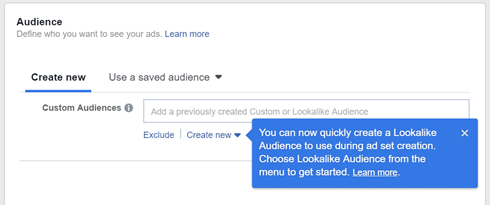
You can also include and exclude specific types of audiences. Click on “Exclude” then choose pre-made audiences or create new audiences to be included or excluded from your advertisement.
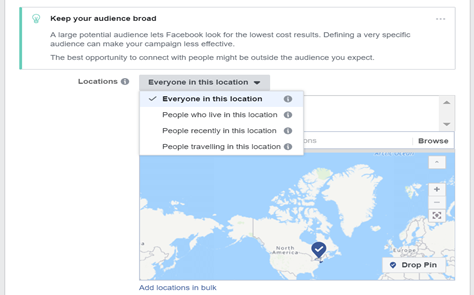
4. Define Location & Demographics
Next, decide where you want your ads to be featured. Are you a local business focused on finding new clients in your local state? Are you a global business looking for new leads for an upcoming conference?
Start by defining the location for your ads. You can adjust the settings based on:
After choosing the location of your ads, you can modify demographic settings, such as:
Age, Gender, Detailed Targeting (i.e. All demographics, interests, and behaviours)

Take some time to adjust these settings and create different types of audiences. At the bottom of this section, click “Save Audience”.
5. Placements
Here is where you can allow Facebook to decide the best placements for your ads or manually choose where you want your ad to go. When you click on “Edit Placements” you can hover over “Device Types” and choose to show your ads on all devices or only on Mobile or Desktop.
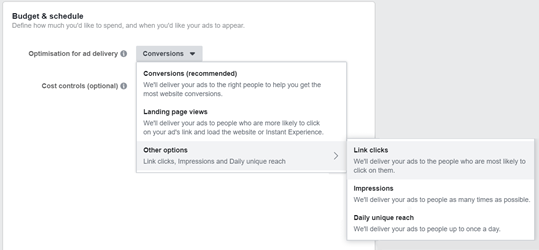
6. Budget & Scheduling
If you didn’t already set a budget on the previous page, you can make any desired changes here. You’ll find a few more options to modify such as:
Optimization for Ad Delivery – Here you can choose a different delivery method. Conversions are the recommended default, however, if you want to experiment with advanced features, you can choose from:
7. Audience Size
As you make adjustments to your ad set, take a look at the widget on the right-hand side of your screen. You’ll find a calculator that shows you the size of the audience you can reach, estimated daily results, and potential conversions. When you’re satisfied with your ad set selection, click “Continue”.
Design your ads
Let’s go through each step to creating ads using Facebook Ad Manager:
1. Name Your Ad
Just as like naming your campaign and ad set, give your ad a unique name to stay organized. If you plan on creating multiple ads in this ad set, you can name each one based on the different settings you choose.
2. Ad Format
With conversions as your campaign objective, you can choose from the following three choices:
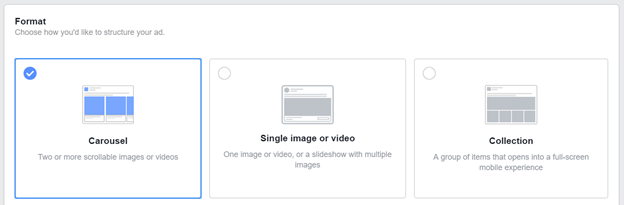
Carousel ads are becoming very popular. You can add two or more images or videos that lead to your main goal (i.e. buy a product, sign up to a list, etc.).
Use a single image or video to showcase a stand-alone creative or design a slideshow with multiple images.
Collection ads are great to use if you have multiple products or services you want to sell in your ads. You can choose between images or videos to showcase your products and services.
3.Upload Media
After selecting your Ad Format, you’ll see a box below where you can upload your media. You can create up to 6 ads using unique images.
4. Ad Links, Copy & Other Options
If you want people to sign up for an event, you can choose “Facebook Event”. With your link in place, you’ll want to create a catchy headline and some compelling “Primary Text”. Add the text, destination URL, and call-to-action button. Then review and place your order to get the ad campaign started. Finally, you can preview your ad on all placements you have chosen your ad to go.
Conclusion
Wow! You finally made it to the end. Your ads have been published and now it’s up to Facebook to do the rest. From here, you can sit back, relax, and wait a few days before you have enough data to decide to continue your ads, increase your ad spend or keep them going for longer. If you want to see how your ads are performing, simply click on “Ads Manager” in the top left corner, then go to “Ads Reporting”.
Subscribe to our Newsletter!
Get the Latest Global Vision Technology Updates.